
Nov
30
2015
30
2015
How to Invoice Your Client Using 2Checkout
The “Online Invoices” Billing and Accounting Software is completely compatible with “2Checkout” so you could invoice your clients and receive payments online to your “2Checkout account”. “2Checkout integration” works with all of our “Online Invoices” software’s Invoice Templates.
Activate “2checkout” on payment your account
To accept online payments for your invoices using “2Checkout”, please follow the following steps:
- Log in to your “Online Invoices” account, or Register for a free account through this link.
- Through the “Settings” tab, select the “Payment Options” option.
- Select “2Checkout”, then mark as “Active”, and add your “2Checkout” account number.
To get your “2Checkout” number and activate the payment through your “Online invoices” system:- While using your “2CO account” click on the “My Account” logo at the top right. There you will see your “Account Number”.
To let your “2CO” update your payment status please do the following steps:- Login to your 2CO account.
- Click on “Account” Tab.
- Click on “Sites Management”.
- Below the “Direct Return”, Select the “Given links back to my website” option.
- Below “Approved URL” enter:
https://Yoursubdomain.onlineinvoices.com/2co - Click “Save Changes”

- While using your “2CO account” click on the “My Account” logo at the top right. There you will see your “Account Number”.
- Click the “Save” button to save changes.
After saving your 2CO settings you are now ready to create new invoices and receive your payments online via “2CO”.
Creating Invoices on the “Online Invoices” system.
To create a new “invoice” please follow the following steps below:
- Through the “Invoices” tab, select the “Create Invoice” option.
- Check this tutorial “Creating your First Invoice“ to learn how to create a professional invoice from the scratch.
- Send the invoice to your client and wait for them to make the payment.
How Can a Client Pay an Invoice Through 2Checkout:
- After receiving the invoice, “he/she” can click the link of the payment, and “he/she” will be directed to this page below:
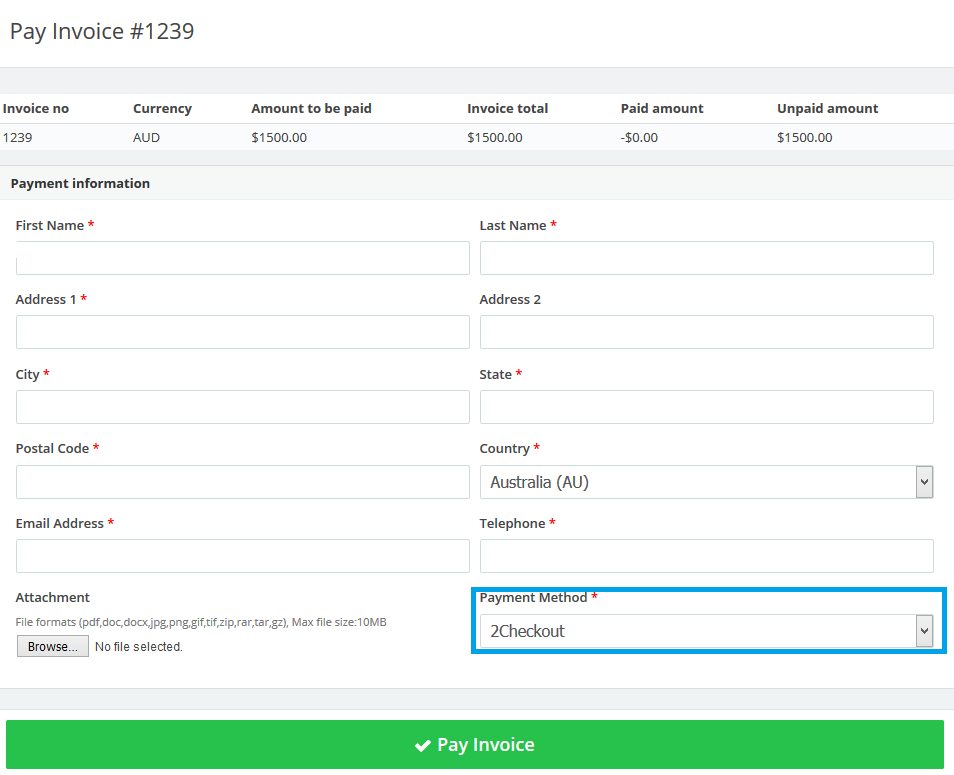
- “He/She” should fill in all the details, and through the “Payment Method” field, select the “2Checkout” option, and then click the “Pay Invoice” button.
- “He/She” will be directed to the “2Checkout” payment page as showing in the figure below.
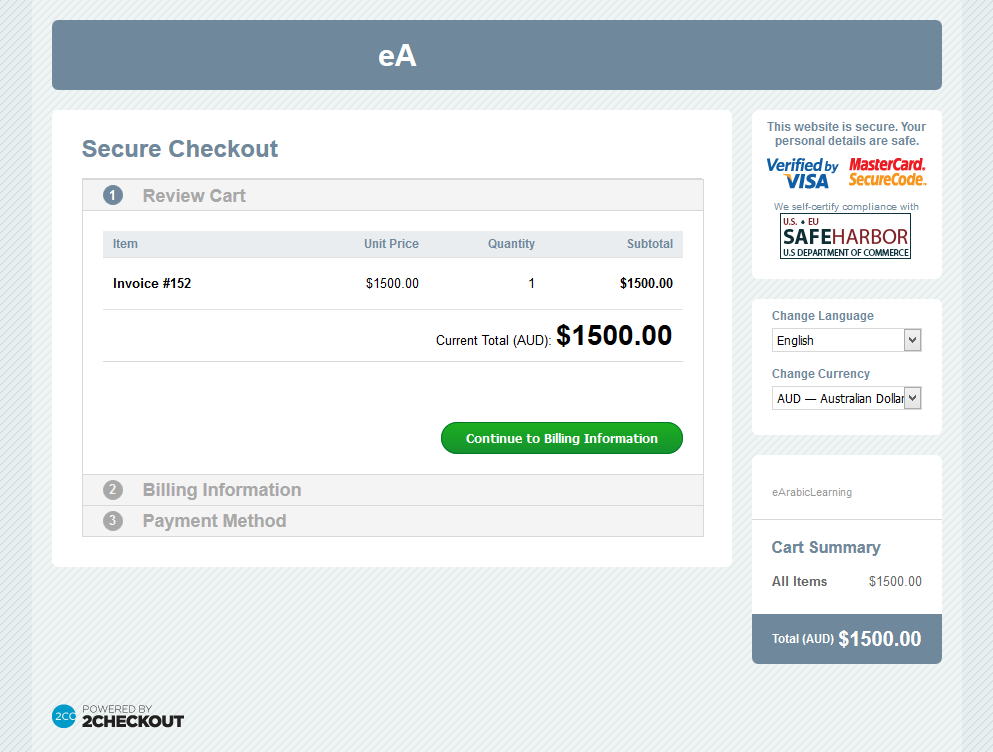
- Fill in the Billing information and pay the invoice with “his/her” favorite payment method.
- Let the business owner know that “he/she” has paid the invoice.
Archives
- October 2022
- June 2022
- May 2022
- April 2022
- February 2017
- November 2016
- October 2016
- July 2016
- June 2016
- April 2016
- March 2016
- February 2016
- January 2016
- December 2015
- November 2015
- October 2015
- July 2015
- June 2015
- May 2015
- April 2015
- March 2014
- October 2013
- August 2013
- June 2013
- May 2013
- January 2013
- December 2012
