
Oct
24
2016
24
2016
How to Manage your Appointments
Appointments management is another feature OI introduces to efficiently manage your clients. You can use appointments in the most effective way that suits your business. E.g. Patients-doctors appointments, , delivery/reception appointments, parents-teachers appointments…etc.
Use the search bar to filter the appointments.
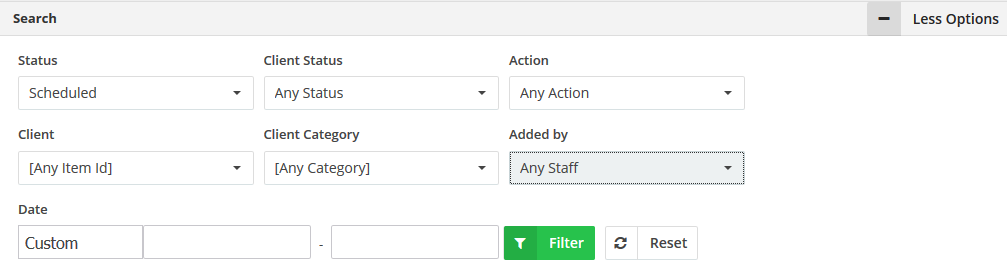
- Filter by the status of the appointments (Scheduled – Dismissed – Done – All).
- Filter by the clients status. This list is customizable to suit your business needs.
- Filter by the action done with the client. This list is customizable to suit your business needs.
- Filter by the client to show only appointments for a certain client.
- Filter by client category. you can assign a category to a client while creating/editing him.
- Filter by the staff member who created the appointments from the added by drop down menu.
- Filter by date range.
To start managing your appointments:
- Through the “Clients” tab, Select the “Appointments” option.
- The appointments page will list all the recent appointments.
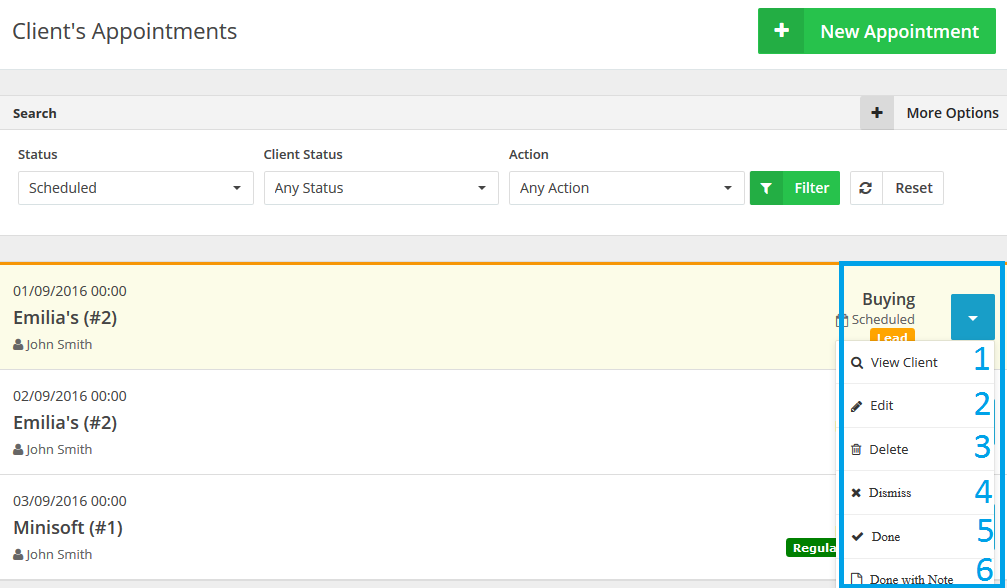
If you want to manage any appointment please click the blue button at the end of the row as showing in the figure above.
- Click “View Client” to view the client associated with the appointment.
- Click “Edit” to modify the appointment.
- Click “Delete” to completely delete the appointment. For your information, Deleted appointments can never be retrieved.
- Click “Dismiss” to dismiss an appointment. Dismissed appointments can be retrieved to their original statuses.
- Click “Done” to mark an appointment as done.
- Click “Done with Note” to mark an appointment as done and add any related notes to the client’s profile.
Archives
- October 2022
- June 2022
- May 2022
- April 2022
- February 2017
- November 2016
- October 2016
- July 2016
- June 2016
- April 2016
- March 2016
- February 2016
- January 2016
- December 2015
- November 2015
- October 2015
- July 2015
- June 2015
- May 2015
- April 2015
- March 2014
- October 2013
- August 2013
- June 2013
- May 2013
- January 2013
- December 2012
