
Feb
3
2016
3
2016
How to import a list of clients from a CSV file
- You can add a numerous number of clients with a few steps without having to enter every client manually to the system by using the import feature. You can import the “Client Number”, “Email”, “Business Name”, “First Name”, “Last Name”, “Telephone”, “Street Address 1”, “Street Address 2”, “City”, “State”, “Postal Code” and “Country”. The” Business Name” field is mandatory and you can choose to add or not to add any of the other fields. The “Email”, “Client Number” and “Business Name” fields must be unique however you can’t add the same email into two or more fields.
To start importing a list of clients please follow these following steps:
Notes:
- Only CSV files / Text files (Comma Separated, Tab Delimited, Column separated can be imported).
- If you have any other file type you can open such file using an intermediate application, such as “Microsoft Excel” and save as CSV and import into the system.
- You can use the import feature to quickly add your data in a spreadsheet and import it into the system, And here we explain to you how to import the data using Microsoft Excel Application.
Step 1: (Create CSV File)
First of all, you need to create your importing file by using Excel program as the below figures
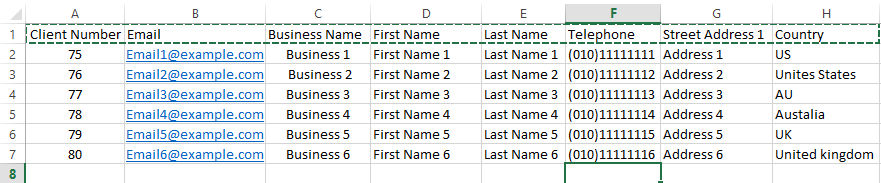
- The “Business Name” is a mandatory field that must be filled out so you can add the column of the “Business Name” however concerning all the extra fields like “Email”, “First Name”, “Last Name” etc. all of these extra fields are optional.
- At the first row add the fields you want to import (for example:) “Client Number”, “Email”, “Business Name”, “First Name”, “Last Name”, “Telephone Number”, “Street Address 1” and “Country”.
- While adding a “Country” you can add the shortcode for the country or the full name.
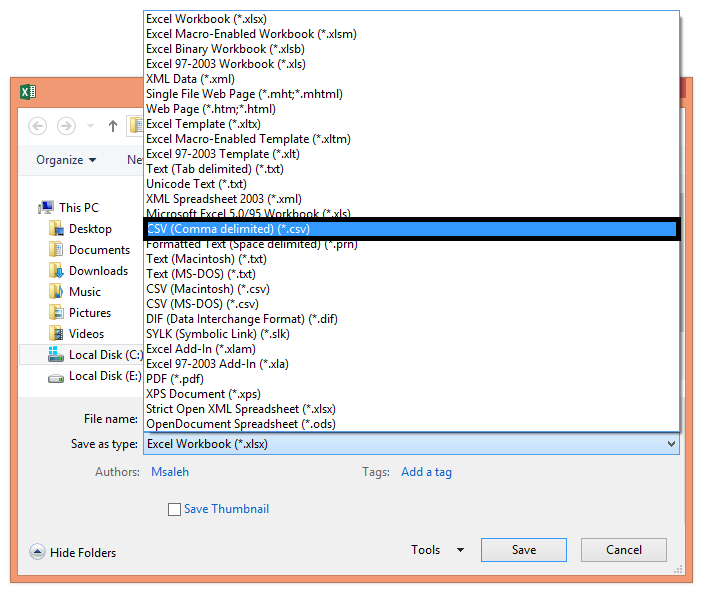
- After you have added all your items save the Excel file as CSV (Comma delimited).
 After you finish creating your “CSV” file, you can now start the importing process through the following steps mentioned below.

- Through the “Clients” tab, select the “Manage Clients” option.
- Click the “Import” button at the top right corner to start the importing process.
Step 2 Import Options:

- Select the file that will be imported (the CSV file we previously saved).
- Through the “Delimiters” drop-down menu, select the “Comma Separated” option.
- Tick the “Import First Row” checkbox if your file contains the same existing labeled column at the first row, if your file doesn’t contain the same content, then we will not tick the checkbox.
Step 3: (Fields Mapping)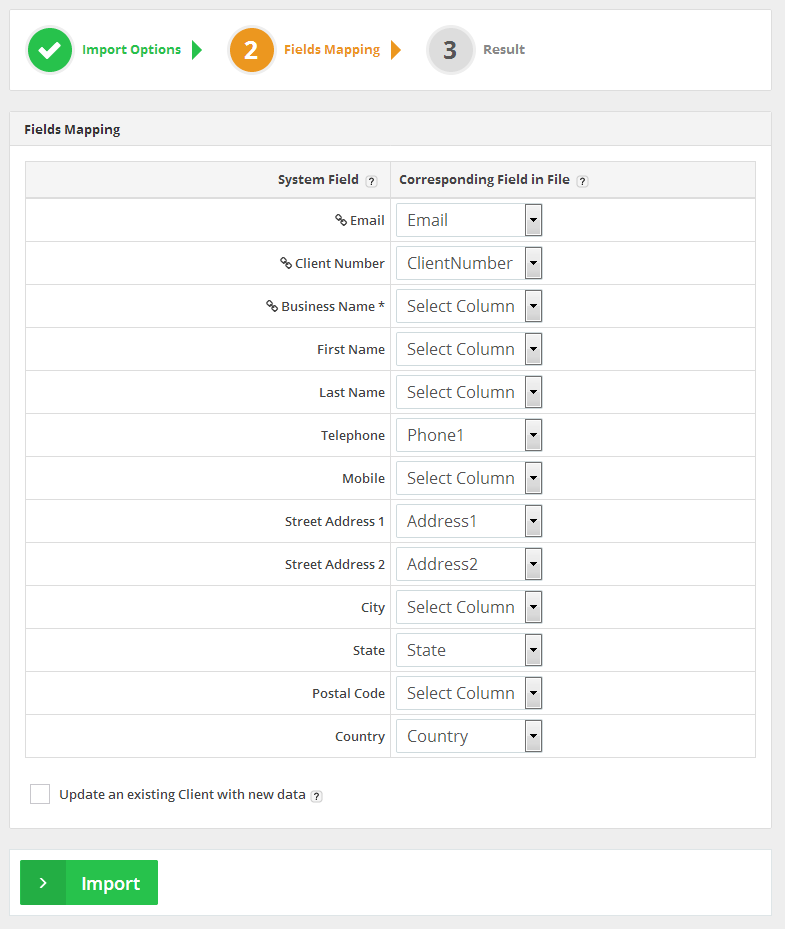
We will map the fields (Columns) of the imported file to the corresponding fields on the system.
The “System Field” column: This column shows which fields on the system you can import the data into.
- “Chain icon”: means that this field is unique (i.e. if you have ticked the “Update an existing client with the new data“ check box and there was a record that contains the same value already then it will update this record with the newly imported record. If you haven’t ticked the “Update an existing client with the new data” check box and there was an existing record containing the same data, It will disregard importing it and will be showing you errors for this specific record.).
- “Corresponding Field“: Each drop-down menu in this column refers to the column headers related to importing your file; please select the equivalent column in your file for each system column (only system fields with “*” are required to have an equivalent selected field).In this case, we can only add the new clients and select a corresponding field on the file for each system field as showing in the above figures and then untick the “Update an existing client with the new data” checkbox as we are adding the new data only.
- Finally, click the “Import” button.
Step 4: (Importing)
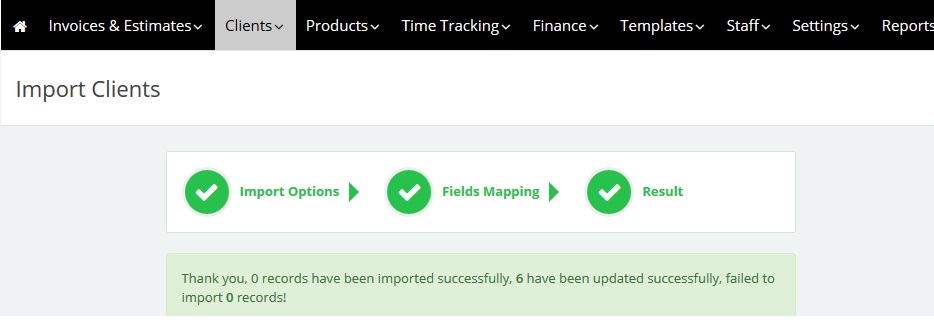
- The system will take a few seconds to import the fields and save them.
- Then refer back to the “Manage Clients” page to check the imported clients.
Archives
- October 2022
- June 2022
- May 2022
- April 2022
- February 2017
- November 2016
- October 2016
- July 2016
- June 2016
- April 2016
- March 2016
- February 2016
- January 2016
- December 2015
- November 2015
- October 2015
- July 2015
- June 2015
- May 2015
- April 2015
- March 2014
- October 2013
- August 2013
- June 2013
- May 2013
- January 2013
- December 2012
