
Nov
16
2015
16
2015
Managing Time Tracking Projects in Online Invoices
Online Invoices “Time tracking” feature is a project based tool, So in order to track your time, you will have to create new projects to have your time entries assigned to.
Create a New Project:
- Through the “Time Tracking” tab, select the“Projects” section.
- Click the “New Project” button.

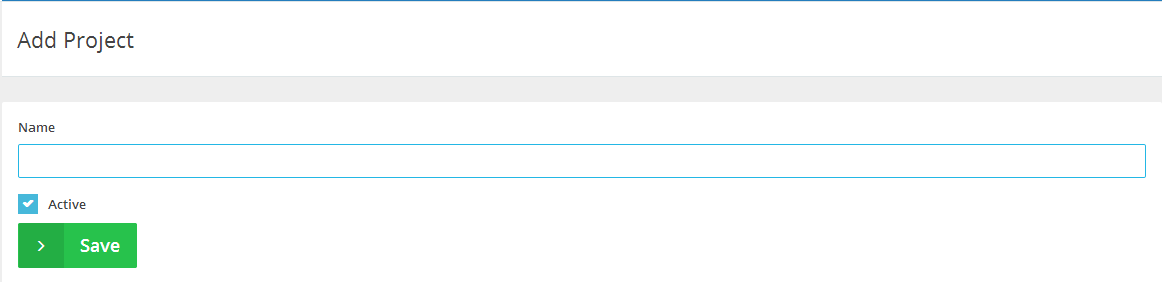
- Add a “Name” to the project and any related notes.
- Tick the “Active” checkbox on the left-hand side to keep the project’s status activated.
- Click the “Save” button.
Edit an Existing Project:
- Through the “Time Tracking” tab, select the “Projects” option.
- Click the “Edit” button below the “Actions” column to modify the required project.


- Edit the “Name” of the project.
- Click the “Save” button to save the changes.
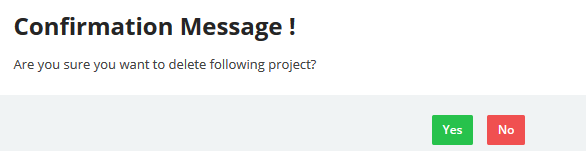
Delete an Existing Project:
- Through the “Time Tracking” tab, select the “Projects” option.
- On the same horizontal row next to the project you want to be deleting click the “Delete” button.

- A confirmation message will populate; so click “Yes” to delete the project or click “No” to close the window.
How to import a list of projects from a CSV file.
- Open the Excel program
- At the first row add the “Project Name” in the A1 field.
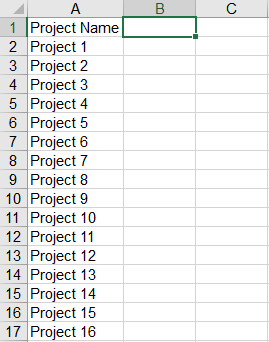
- Below each field fill out the projects entries as showing in the following figure.
- After you finish adding all your projects, save the excel file as CSV (Comma delimited.).
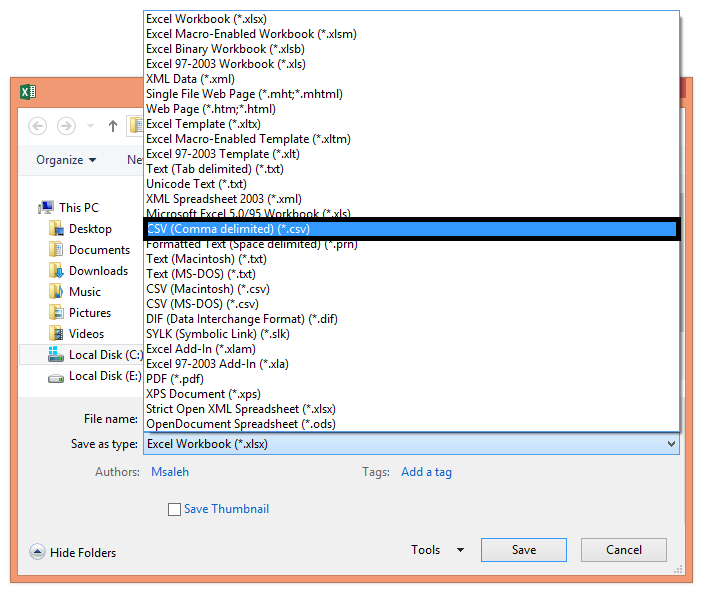
- Login into your online invoices account.
- Through the “Time Tracking” tab, select the “projects” option.
- Click the marked in blue “Import” button at the top right corner.

The importing wizard will start.
Step 1 Import Options:
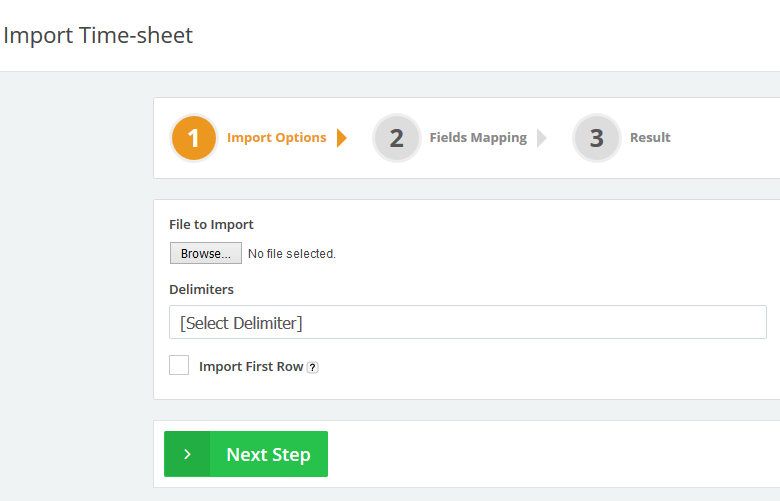
- Determine the file that will be imported (the CSV file we previously saved) by clicking on the “Browse” button.
- Through the “Delimiters” section select “Comma Separated”.
- Click “Import First Row” check box. If your file contains the field labels existing at the first row so in this case, we will not tick the checkbox.
- Click the “Next Step” button.
Step 2 Fields Mapping:
- The “System Field” column: This column shows which fields on the system can the imported data be uploaded into; “*” meaning that this field must be filled (mandatory), and “Chain icon” means that this field is unique (i.e. if you have checked the “Updated an existing Project with the new data” check box and there was an existing record that contains the same field value then it will update that existing record with the newly imported record. If you didn’t check the “Updated an existing Project with the new data” check box and there was a record with the same existing data then it will ignore importing it and will be showing you errors regarding this record.
- The “Corresponding Field on File” column: Each drop-down menu on this column shows all the column headers on your file. Please select the equivalent column on your file for each system column (only system fields with “*” are required to have an equivalent selected field).
- In this case, we only added the new project and selected a corresponding field in the file for each system field as showing in the figure above, and the “Update an existing Project with the new data” checkbox will not be checked as the process will be adding the new data only.
- Click the “Import” button.
Step 3 Importing:
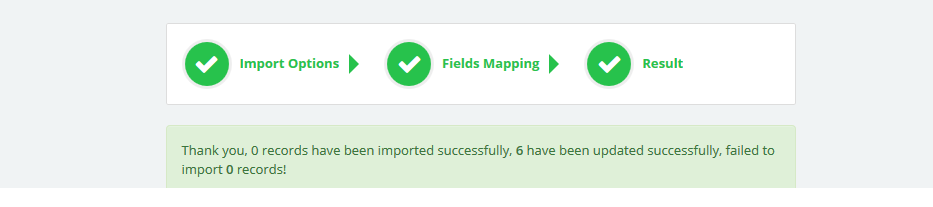
- The system will take a few seconds to import the fields and save them.
- Refer back to the “Projects” page to check the imported projects.
Archives
- October 2022
- June 2022
- May 2022
- April 2022
- February 2017
- November 2016
- October 2016
- July 2016
- June 2016
- April 2016
- March 2016
- February 2016
- January 2016
- December 2015
- November 2015
- October 2015
- July 2015
- June 2015
- May 2015
- April 2015
- March 2014
- October 2013
- August 2013
- June 2013
- May 2013
- January 2013
- December 2012
