
19
2016
Manage Inventory Products in the OnlineInvoices Inventory system
Through the “Inventory” tab, select the “Inventory” option.
The Inventory page displays all inventory “Products” or “Services” you have added to your system.
To create a “New Product”, click the “New Product” button.
Use the “Search” bar to search for products by “Name”, “Code”, “Tag”, “Category”, “Brand”, or “Status”.
Each listed inventory item will show its “Name”, “Code”, “Barcode”, “Status” (“IN STOCK” – “INACTIVE” – “LOW STOCK” – “OUT OF STOCK”), “Buy Price”, and “Retail Price”. 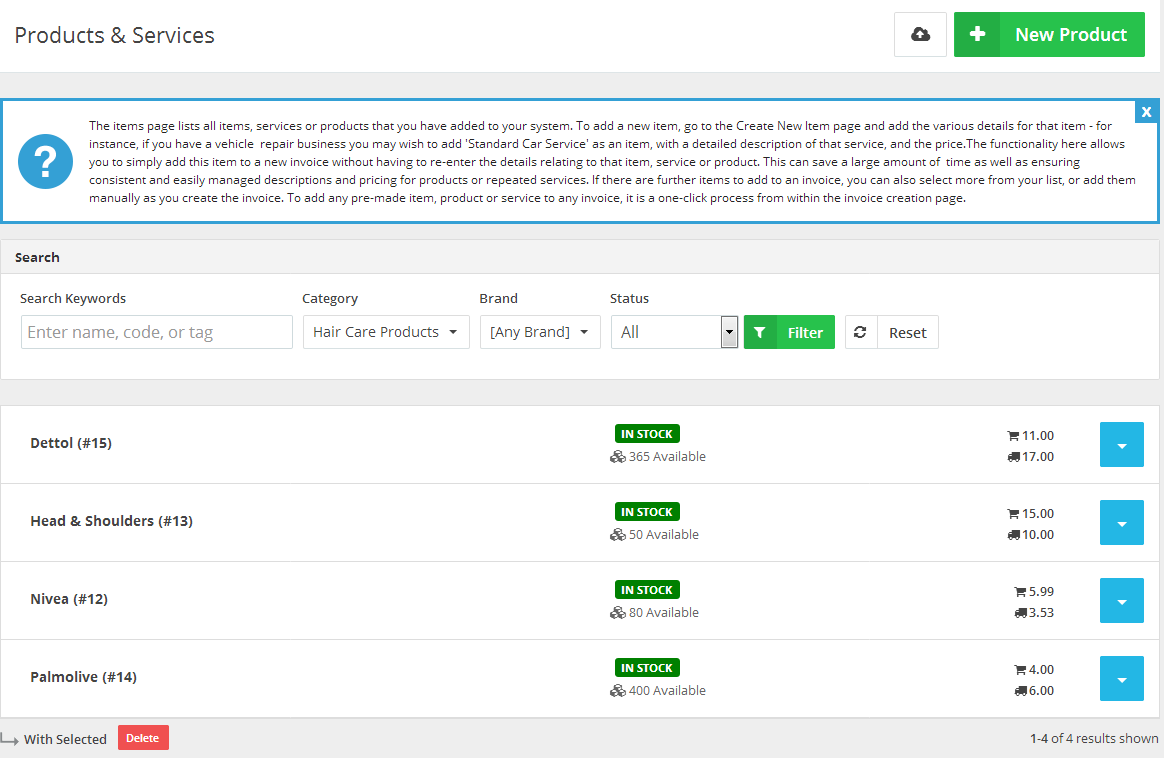
Edit an Inventory product
- Through the “Inventory” tab, select the “Inventory”.
- Next, to the product you want to edit on the same horizontal row, click the “Blue” button and select the“Edit” option.
Delete an inventory product.
- Through the “Inventory” tab, select the “Inventory” option.
- Next, to the product, you want to delete on the same horizontal row, click the “Blue” button and select the “Delete” option.
View an inventory product’s information.
- Through the “Inventory” tab, select the “Inventory” option.
- Next, to the product you wish to view on the same horizontal row, click the “Blue” button at the right-hand side and select the “View” option.
- Click the “Information” tab.
The information tab will display the product details and disclose how many items were sold.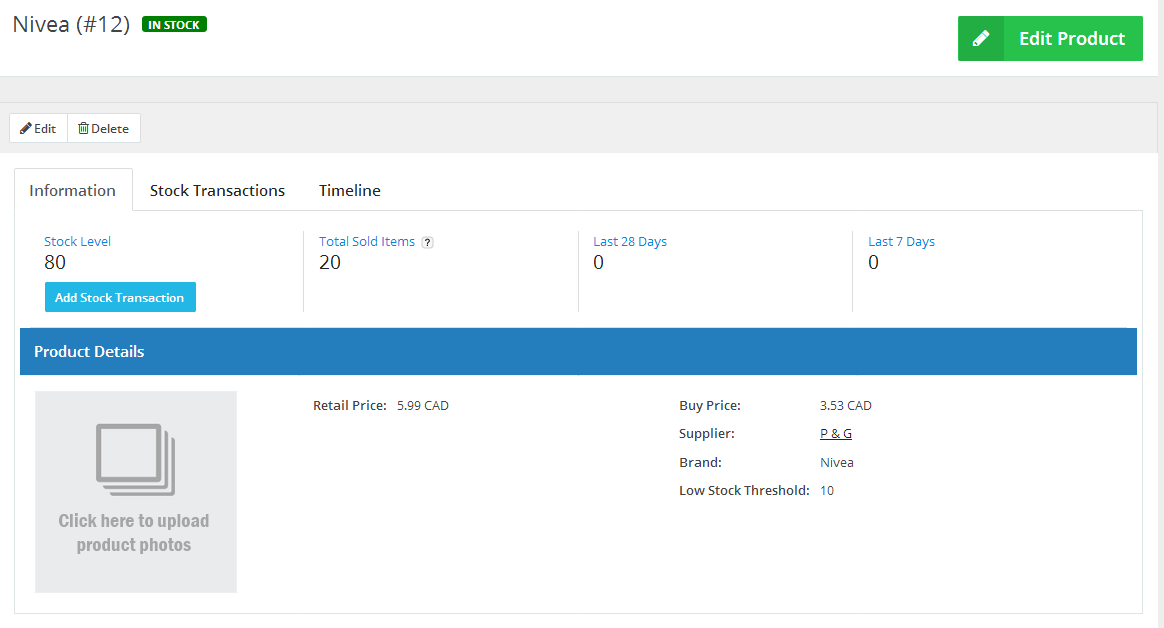
Edit a Stock level (quantity) of a certain product.
Once you have created a product and added the Initial Stock levels, the “Quantity”
will change automatically with the new sales orders or purchases orders. To adjust a certain product’s “Quantity”, Please follow the following steps.
- Through the “Inventory” tab, select the “Inventory” option.
- Next, to the product you wish to view on the same horizontal row, click the “Blue” arrow and select the “View”.
- Click the “Information” tab.
- Click on the “Adjust Manually” button under the stock level option.
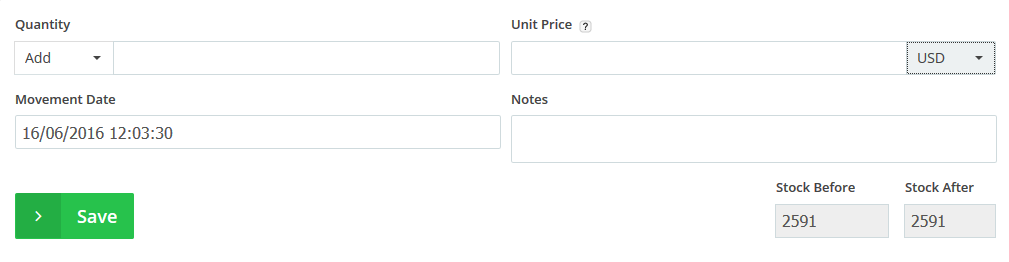
- Through the “Quantity” option, choose to add or subtract and add the number you wish to add/subtract to the stock level.
- Add the “Unit Price” of the buy/sell addition and choose the currency.
- Determine the “Movement date”.
- Add any related notes.
- The “Stock Before” and “Stock After” will show the changes applied to the quantity of the stock before and after this modification done.
Click the “Save” button.
Review the latest stock Transactions
All the Stock Transactions are recorded internally in your system. To view the latest “Stock Transactions”:
- Through the “Inventory” tab, select the “Inventory” option,
- Next, to the product you wish to view on the same horizontal row, click the “Blue” button on the right-hand side arrow and then select the “View” option.
- Click the “Stock transactions” tab.
The “Stock Transaction” tab will show all the latest actions done to the stock level (“Purchase orders” – “Sales Orders” – “Manual Adjustments”), “Modification Date”, “Move Count”, and “Stock Level”.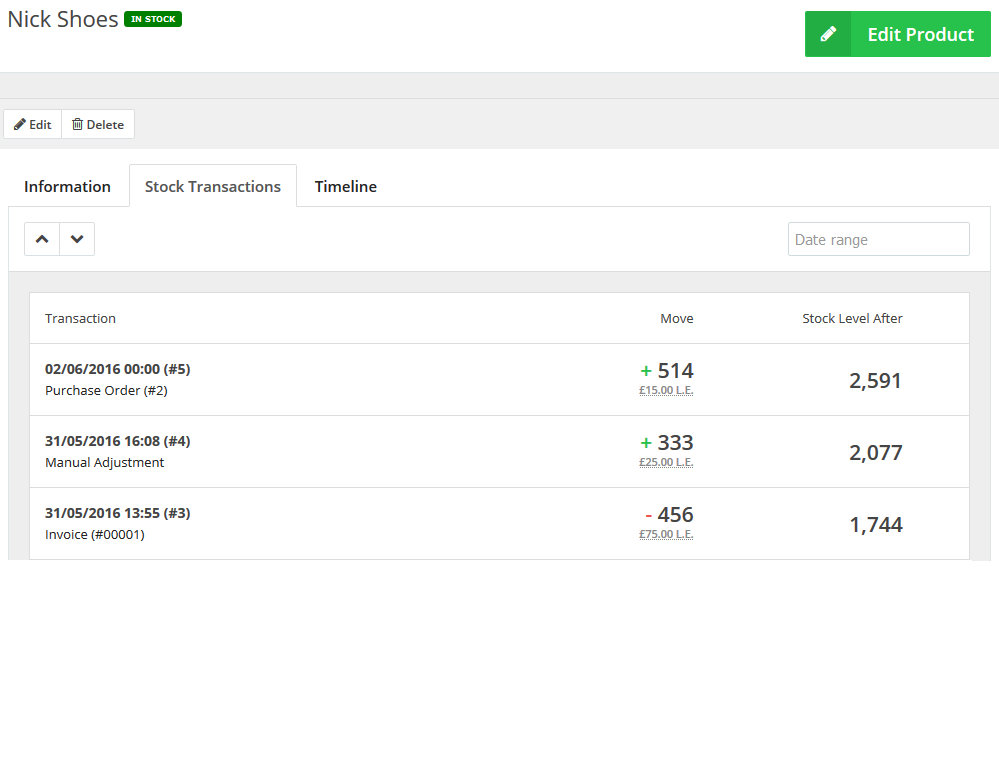
Review the Timeline of a certain stock.
All “Stock Transactions” are internally recorded in your system. To view the latest “Stock Transactions”:
Please follow the following steps.
- Through the “Inventory” tab, select the “Inventory” option.
- Next, to the product you want to view on the same horizontal row, click the “Blue” button on the right-hand side and select the “View” button.
- Click the “Timeline” tab.
The” Timeline” tab will show all the latest actions done in regards to the stock level (“Purchase orders” – “Sales Orders” – “Manual Adjustments” – “Delete”), date of the action, stock level after the action, and which staff member performed those actions.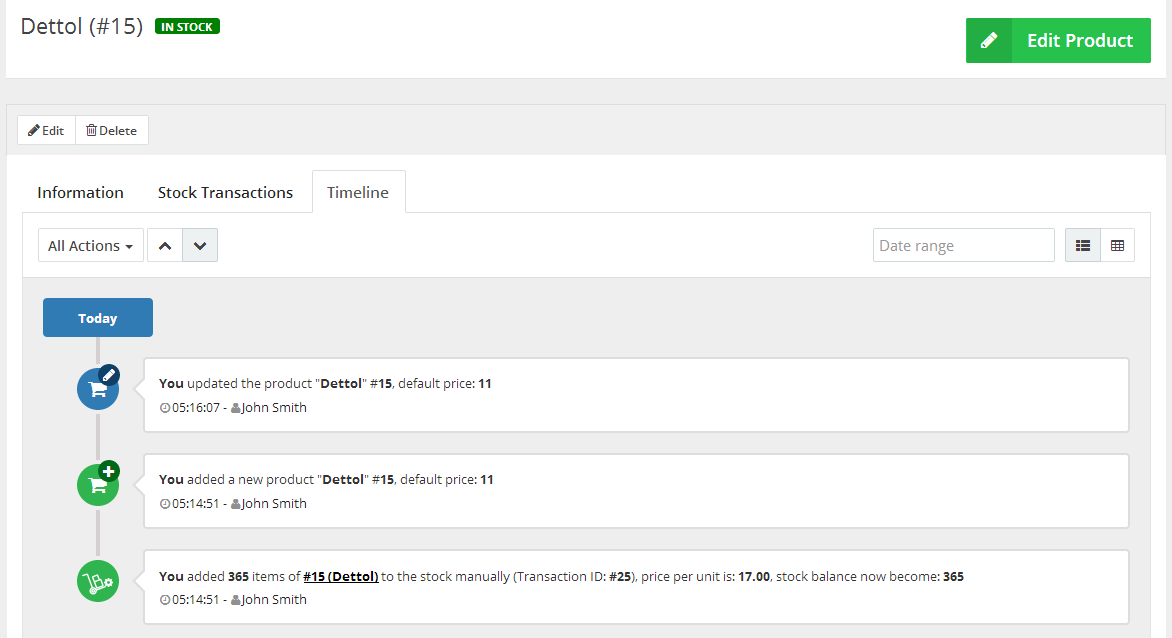
Archives
- October 2022
- June 2022
- May 2022
- April 2022
- February 2017
- November 2016
- October 2016
- July 2016
- June 2016
- April 2016
- March 2016
- February 2016
- January 2016
- December 2015
- November 2015
- October 2015
- July 2015
- June 2015
- May 2015
- April 2015
- March 2014
- October 2013
- August 2013
- June 2013
- May 2013
- January 2013
- December 2012
