
Nov
16
2015
16
2015
Creating Expenses in Online Invoices
 “OnlineInvoices” also works as an “Expense Tracker Software”
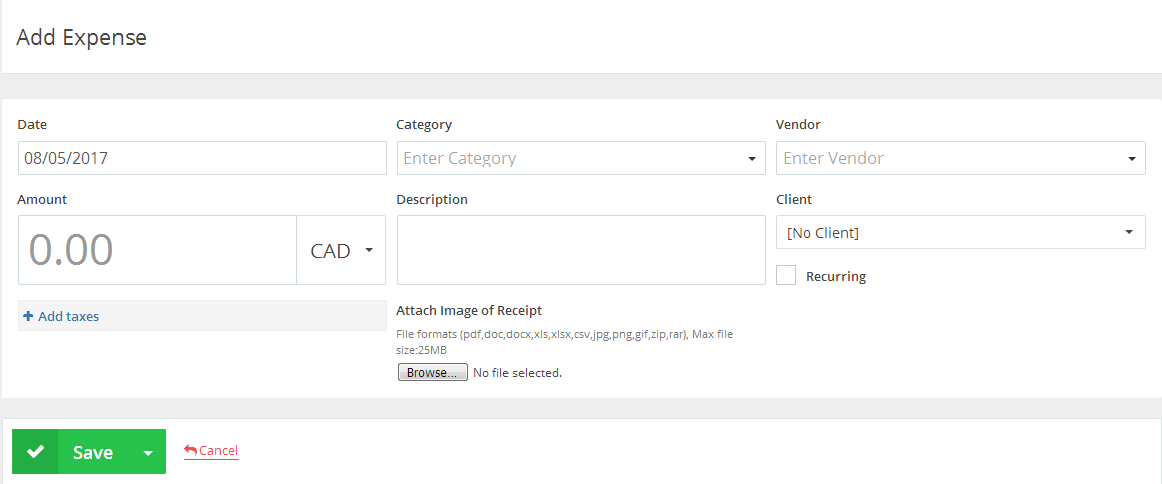
Creating or adding new expenses to your online invoices system:
Through the “Finance” tab, Select the “Add Expenses” option.
- Select a “Date” for the expense you want to be adding.
- Add the “Amount” of the expense and select the “Currency”.
- “Attach Image of Receipt” to the expense through the “Browse” option.
- Select a “Category” from the drop-down menu or add the “Category” manually -all inserted categories are saved once you click the “Save” button.
- Select a “Vendor” from the drop down menu or insert the “Vendor” manually, all inserted “Vendors” are saved once you click the “Save” button.
- Add a “Description” for the expense.
- Assign the expense to one of your “Clients”.
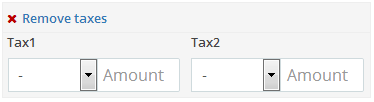
- Add the applicable tax into the “Tax1” or “Tax2” fields and also determine your tax “Amount” into the “Amount” field.all those taxes are included in the expense total. To create new taxes click Managing Tax Options for Online invoices.
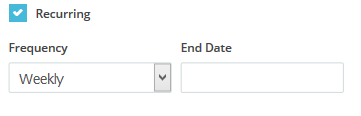
- Select whether this expense is “Recurring”:
- Tick the “Recurring” check box.
- Select the “Frequency” of the invoicing.
- Select the “End Date” for the last invoice
- Click the “Save” button to save the new expense.
How to import a list of expense entries from a CSV file.
- Open the Excel program
- At the first row add the fields “Amount”, “Currency”, “Category”, “Vendor” and “Note” in the A1…F1 fields.
- Below every field fill out all the details as in this following figure.
- The “Date” field must be formatted the same format as your system’s date format so in this case, we will be using the DD/MM/YYYY format.
- The “Currency” field must be added in the country’s “Currency” code, like such as “USD”, “AUD”, ..etc.
- All the added categories “Category” and vendors “Vendor” are automatically saved.
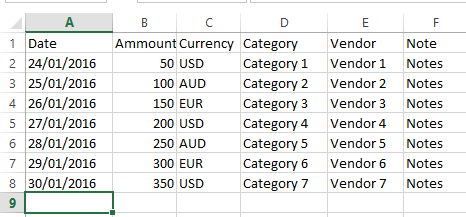
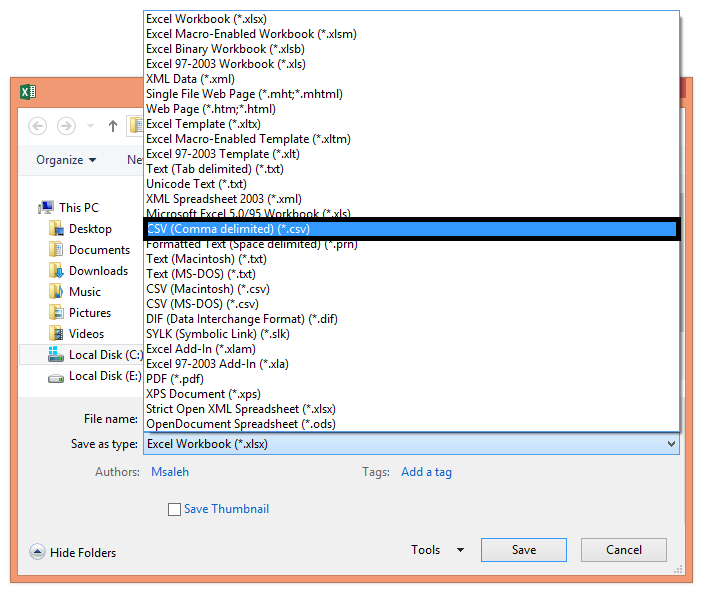
- After you have added all your items save the Excel file as CSV (Comma delimited.).
- Log in to your “Online Invoices” account.
- Through the “Finance” tab, Select the “Expenses” option.
Click the blue marked “Import” button at the top right corner.
The importing wizard will start.
Step 1 Import options:
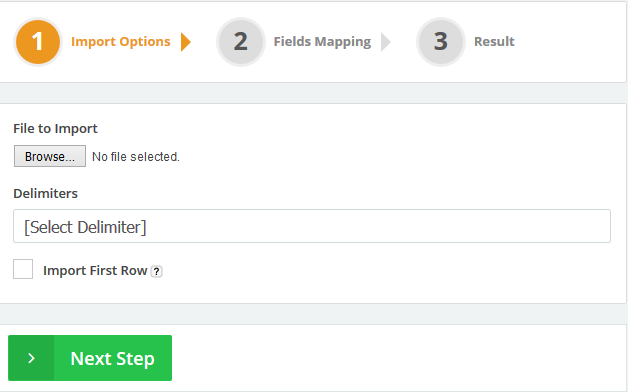 Select the file that will be imported (the CSV file we previously saved).
- Through the “Delimiters” section, Select the “Comma Separated” option.
- Click the “Import First Row” check box. If your file contains the same field labels existing at the first row so, In this (Case) we will not be ticking the checkbox.
- Click the “Next Step” button.
Step 2 Fields Mapping:
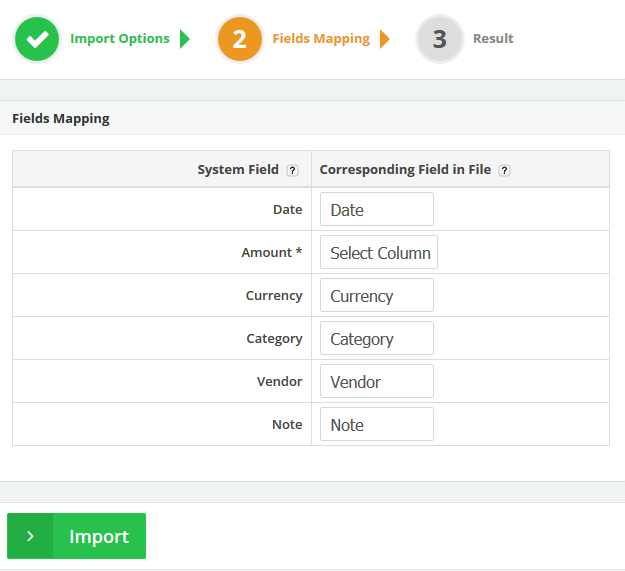
- On this step, We will map the fields (Columns) on the imported file to the corresponding fields on the system.
- The “Amount” field is required and must be existing on file.
- Select a corresponding field on the file for each system field as showing in the figure above.
- If you have entered a new “Category” or “Vendor” so it will be saved on the system.
- Click the “Import” button.
Step 3 Importing:
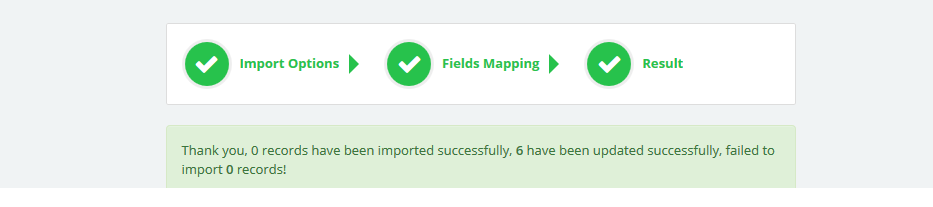
- The system will take a few seconds to import the “Fields” and save them.
- Refer back to the “Expense” page to check the imported items.
Archives
- October 2022
- June 2022
- May 2022
- April 2022
- February 2017
- November 2016
- October 2016
- July 2016
- June 2016
- April 2016
- March 2016
- February 2016
- January 2016
- December 2015
- November 2015
- October 2015
- July 2015
- June 2015
- May 2015
- April 2015
- March 2014
- October 2013
- August 2013
- June 2013
- May 2013
- January 2013
- December 2012
